
In my craft space, there is no such thing as too much neon. I can’t seem to get enough of this trend: papers, inks, pens and – most recently – glitter. Five containers of glorious neon glitter, and I’m certain I won’t use all of it but I’ll make a valiant effort.
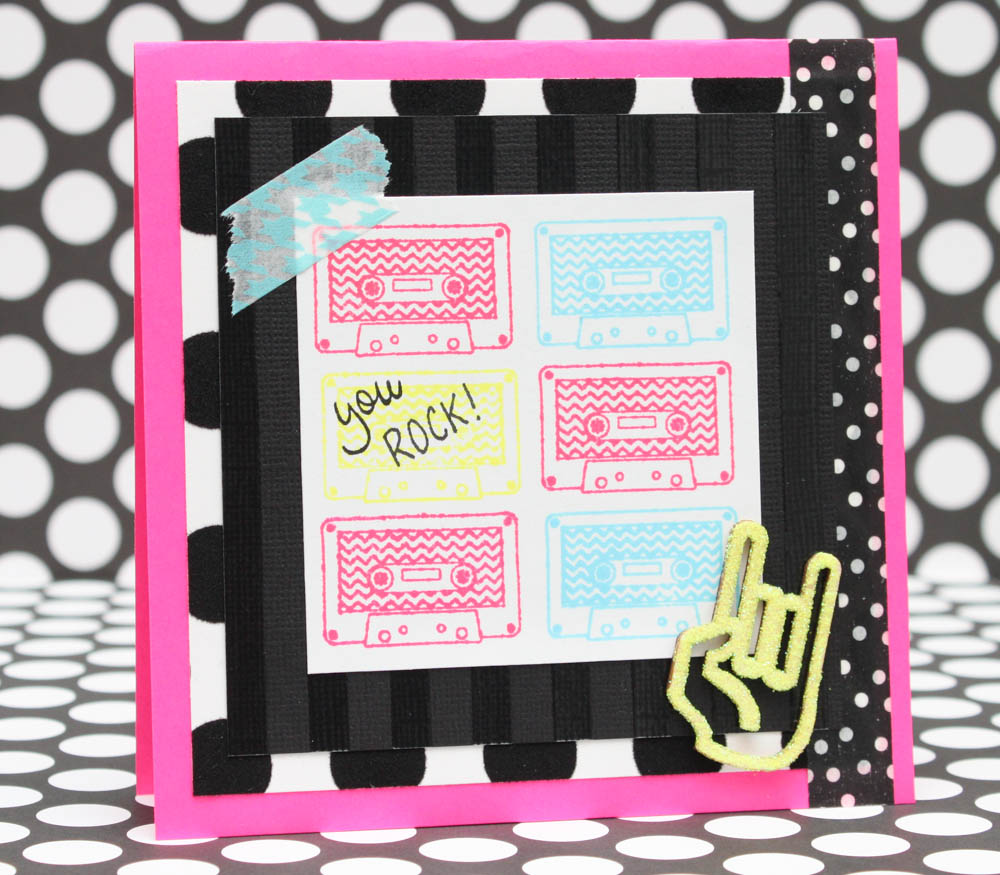
This card is all retro: I combined my bright neons with a stamped image of a (not-so-old) relic: the cassette. I get nostalgic looking at this stamp, but I’ll take digital music files over analog versions any day, thank you very much.
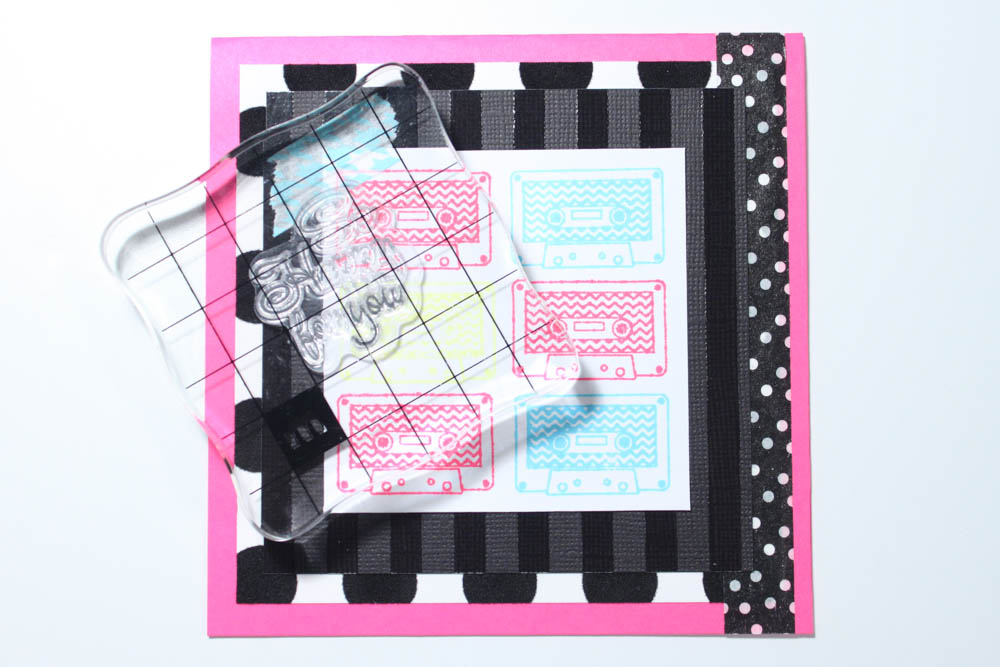
There’s a lot of neon in this design and a lot of patterns. I incorporated stripes, hounds tooth and two sizes of polka dots. Add the chevron pattern from the stamp, and there’s lot going on visually. The black and white tempers the look and provides a neutral backdrop for the neon colors.
Ready to rock? Here’s how to make it:
Make a card from a 5-by-10-inch piece of neon-pink cardstock. Cut a piece of flocked, black-and-white polka dot cardstock (mine’s from the Black & White collection by Me and My Big Ideas) to 4 1/2 inches square and adhere it, centered, to the card’s front. Affix a piece of black-and-white polka dot washi tape (such as black dots from the SMASH collection by K & Co.) vertically from the top edge to the bottom edge of the card’s front, close to the right edge. Trim any excess tape from the top and bottom edges.

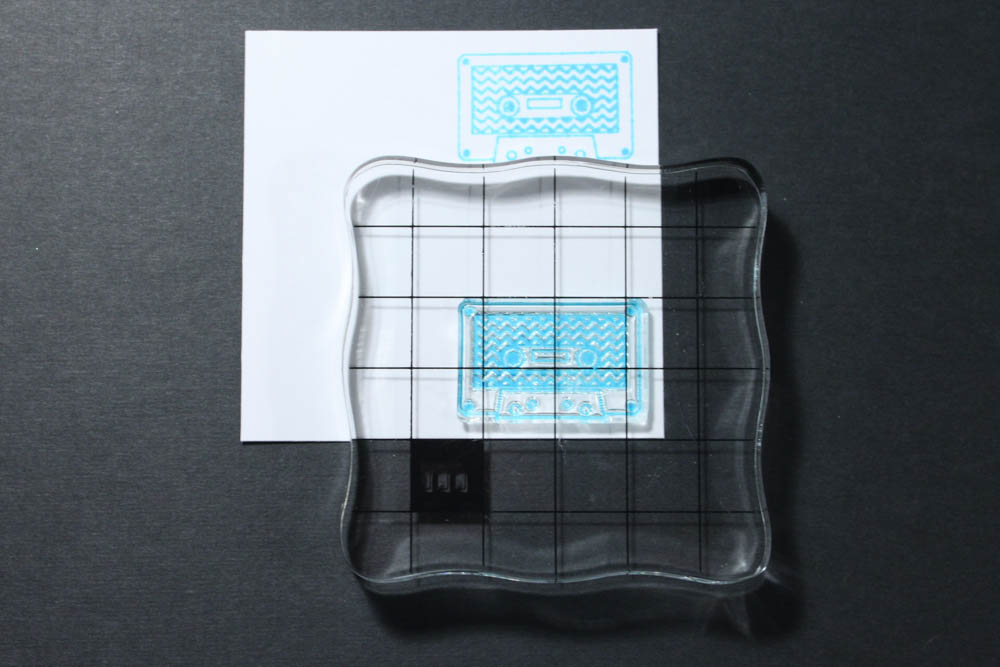
Cut a piece of white cardstock to 3 inches square. Stamp a small cassette image (mine’s from the Cheese set from the Hipster stamp collection by Basic Grey and Hero Arts) in neon-blue ink (Hero Arts) close to the upper-right and lower-right corners of the paper.
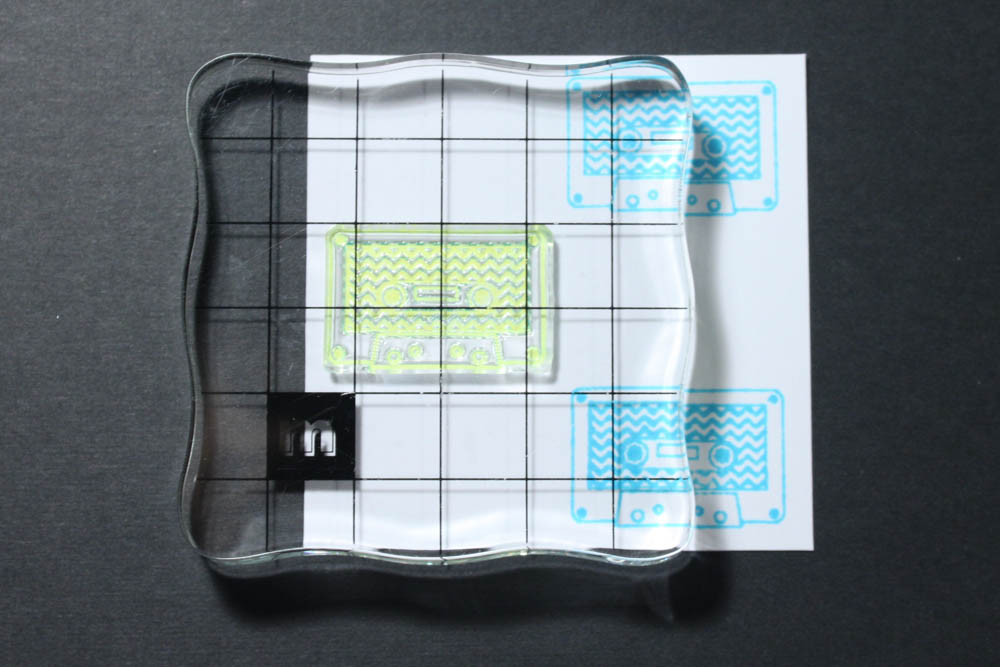
Stamp the image in neon-yellow ink (Hero Arts) close to the left edge of the paper, centered.
Stamp the image in neon-pink ink (Hero Arts) close to the upper-left and lower-left corners of the paper and close to the right edge, centered.

Cut a piece of spot-varnished, striped black cardstock (I used Bazzill Basics glazed cardstock in stripe – raven) to 4 inches square and adhere it, centered, to the polka dot cardstock. Adhere the stamped piece, centered, on top of that. Affix a small piece of bright-blue, hounds tooth washi tape (mine’s by Doodlebug Design Inc.) diagonally over the stamped piece’s upper-left corner.
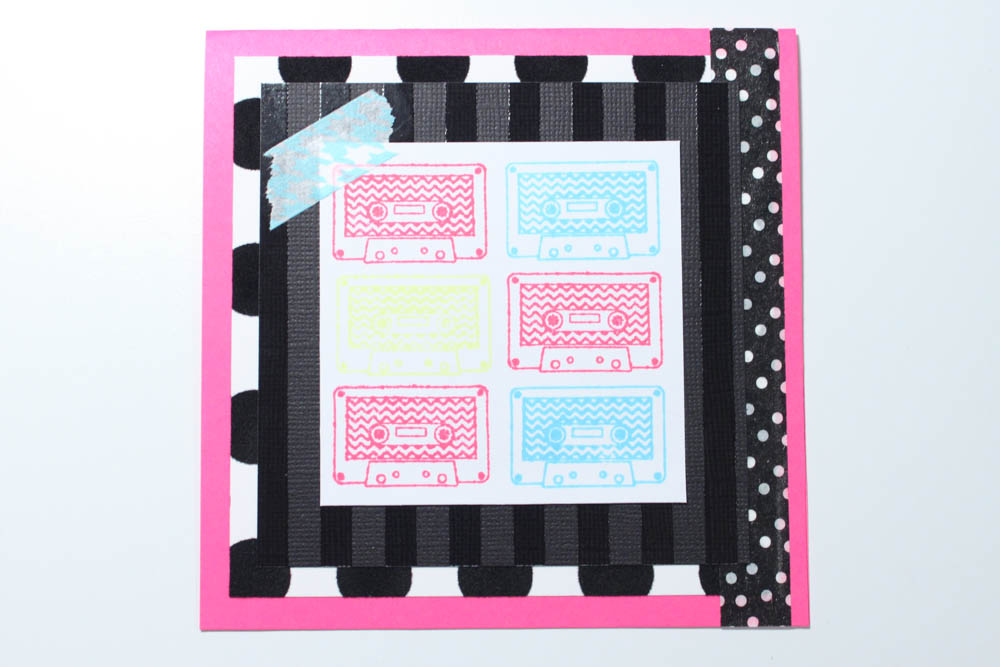
Apply glue (I used Aleen’s Jewel-It) to one side of a wood veneer die-cut of a “rock on” hand sign (mine’s from the Hipster collection by Basic Grey). Cover the glue in neon-yellow glitter (such as American Crafts neon Wow! glitter in lemon) and shake off the excess.

Stamp “you” (I used part of a stamp from the Celebration Expressions collection by Inkadinkado) in black ink (such as Versafine in onyx black) diagonally over the neon-yellow cassette.
Write “ROCK!” in black pen (I used Sakura Pigma Micron 01, .25 mm) diagonally beneath “you.” Adhere the wood piece to the lower-right area of the card’s front.

I love it!! Love how bright and fun it is!! 🙂
Cool card!
Love that cassette tape! Fun card with great colors! 🙂 Blessings,
What a fun card! Love all the great elements you included 🙂
i really like how you used the stamp several times – it’s a great look!
you do neon so well! also love the ad at the end of your post – i have MS – love hearing others talk about it – makes me feel so “normal” !