
I like to use retro and nontraditional colors on my holiday cards (as evidenced by my use of neon this year). Using glitter cardstock in colorful combinations really catches the eye, too.
For the past three years, I’ve turned to a colorful, striped holiday cardstock (seen in the first card) again and again. That paper first got me to break away from cards in traditional Christmas colors and craft cheerful, bright creations.
I may have gone a little overboard with these, and they may not be to everyone’s tastes, but they’re fun!

Here’s how to make them:
Card one: Fun with snow
Cut a piece of white textured cardstock to 4 inches square. Create three 2-inch snowflake-shaped “windows” (I used my Making Memories Slice Elite and “Noel” design card) in a random fashion on this piece.
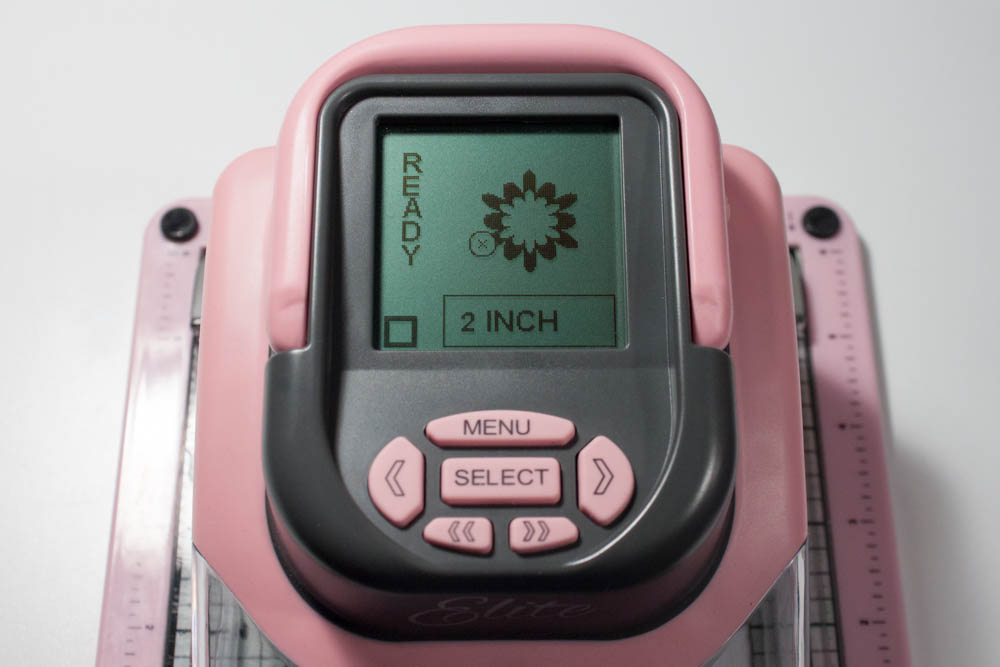
I used my Making Memories Slice Elite and “Noel” design card to die-cut three 2-inch “windows” on a 4-inch-square piece of white textured cardstock. This snowflake is the layered piece of a design (the “Noel” design card offers layering).


Adhere a piece of lime-green glitter cardstock (such as American Crafts glitter cardstock in leaf) behind one snowflake window and red-glitter cardstock (such as Recollections glitter cardstock in rouge) behind another.

Make a card from a 5-by-10-inch piece of red glitter cardstock (Recollections). Cut a 4 1/2-inch-square piece of colorful, striped holiday cardstock and adhere it, centered, to the card’s front. Using dimensional adhesive, adhere the white cardstock, centered, to the striped cardstock. Adhere a 3-inch snowflake die-cut in light-blue glitter cardstock (I used my Slice, “Noel” design card and glitter cardstock from the Fresh Paint collection by Marcella by K) to the upper-right corner of the white paper. Adhere a 2-inch snowflake die-cut, also in light-blue glitter cardstock, to the bottom of the white paper, off-center to the left. Adhere large clear rhinestones (mine are from Recollections) to the center of each blue die-cut.
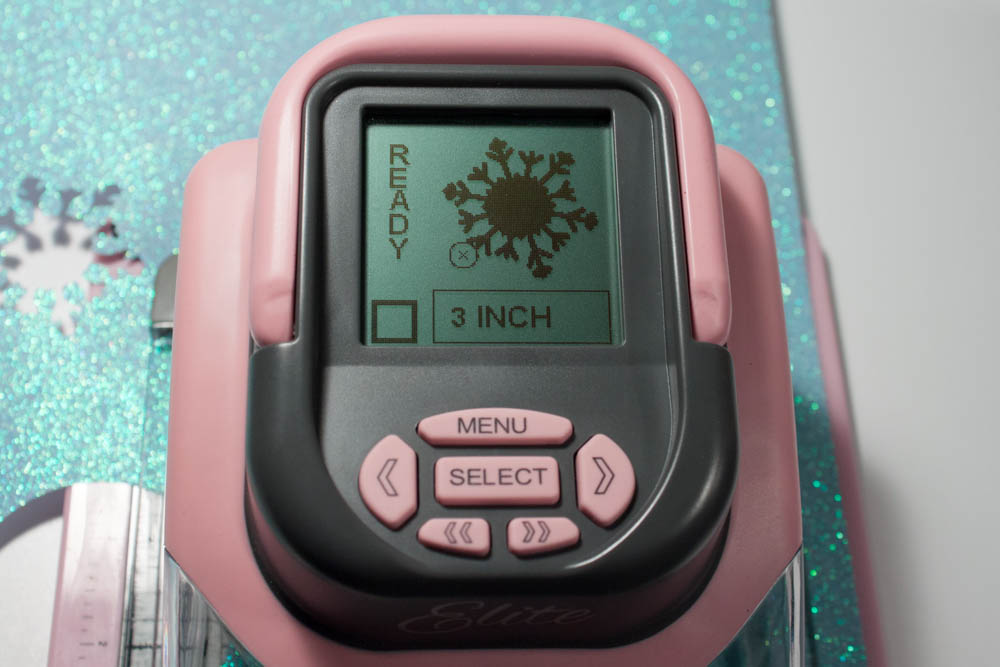
I used my Slice and “Noel” design card to create a 3-inch die-cut of a snowflake in light-blue glitter paper. I then made another die-cut at 2 inches.
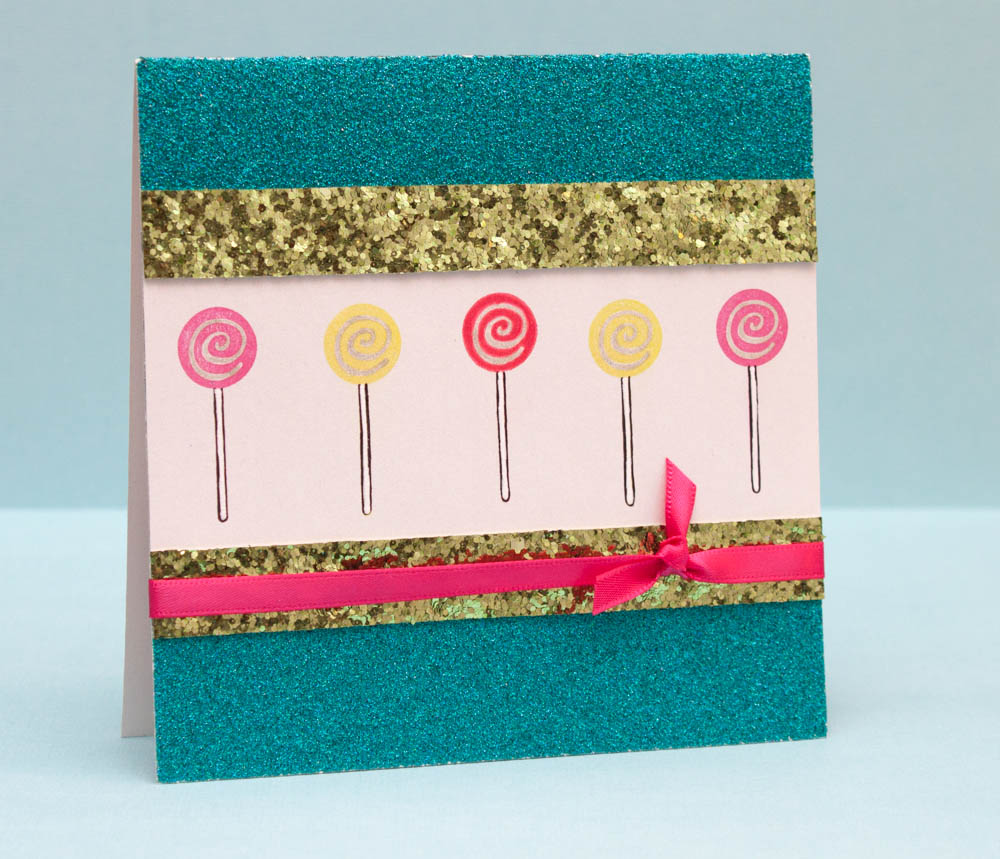
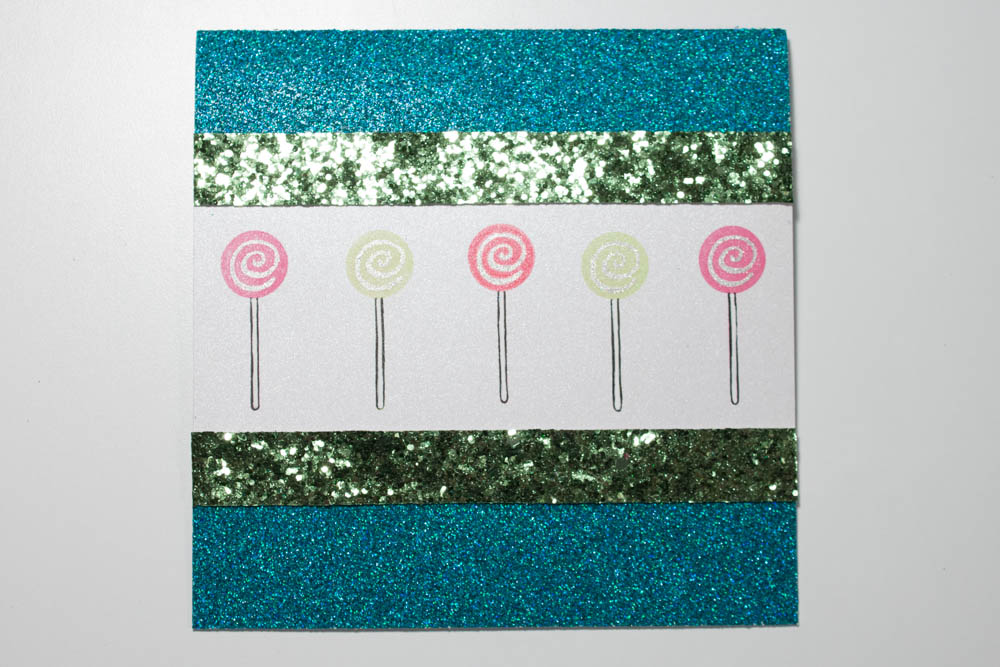
Card two: Sweet holidays
Cut a 5-by-2 1/4-inch piece of white pearlescent cardstock (I used one from the pearlescent neutrals collection by Colorbok). Stamp a lollipop image (mine’s by Josephine Kimberling for Impress Rubber Stamps) in fuchsia, lime-green and red inks (mine are Fresh Ink in fuchsia, ColorBox Petal Point Enchantment collection in lime and Martha Stewart Crafts in poinsettia) five times in a horizontal row in the middle of this piece. I chose to have the left and right lollipops in fuchsia, the middle one in red and the other two in lime. I also made pen marks on scrap paper above and below the cardstock at half an inch, 1 1/2 inches, 2 1/2 inches, 3 1/2 inches and 4 1/2 inches to help guide me where to stamp.
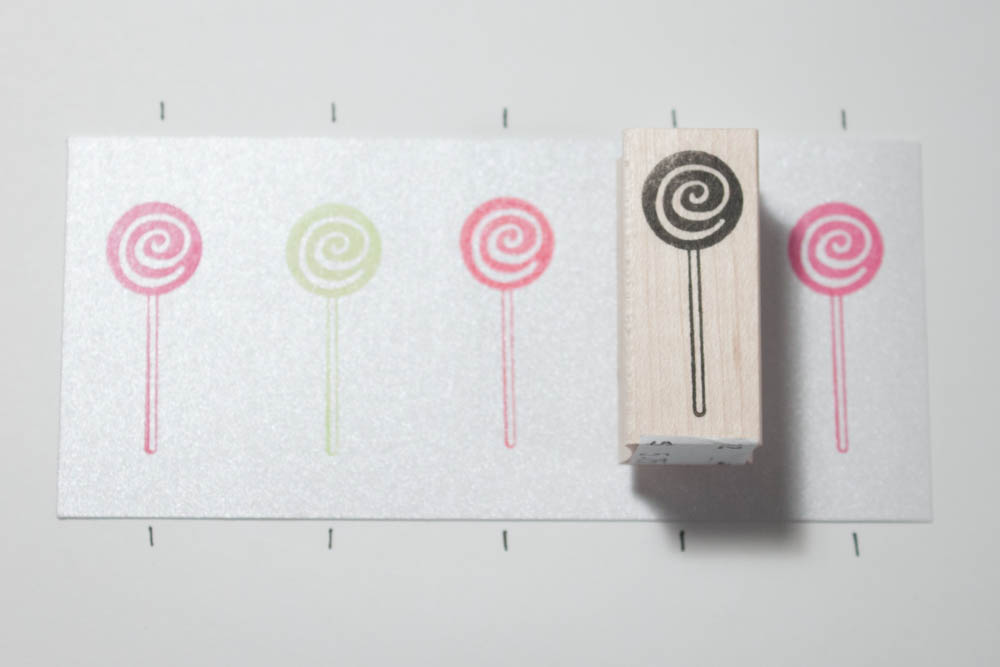
Trace over each lollipop’s stick in black pen (I used Sakura Pigma Micron 01, .25 mm) and fill the sticks in with white pen (such as Sakura Gelly Roll in white). Trace the white swirls of each lollipop with glitter pen (I used Sakura Gelly Roll in glitter).

Make a 5-by-10-inch card in teal glitter cardstock (Fresh Paint collection). Adhere the white piece, centered, to the card’s front. Adhere two pieces of lime-green glitter ribbon (I used American Crafts glitter ribbon in cabbage) to the top and bottom edges of the white cardstock.
Tie a hot-pink satin ribbon in a knot around the card’s front, centered over the bottom piece of glitter ribbon, positioning the knot on the right side.

I especially love that first one with those negative cuts!
Very nice! Happy holidays!