
With a blizzard turning my region of the country into a winter wonderland, this card seems appropriate.
I created the hills of snow with layers of vellum, which softens the black-and-white snowflake pattern behind them. Sticking washi tape over the raised layers did not come easily, though. It had to be glued on to keep it from popping up.
After a little glue, a little drawing, a little bling and a lot of vellum, my snowscape was complete, and now the blizzard outside seems kinda pretty (as long as I don’t have to go out in it).

Here’s how to make it:
Cut four pieces of vellum to 9 inches by 3 1/2 inches. On one piece, stamp a reindeer image (such as jaunty reindeer by Paper Inspirations) in silver ink (I used Brilliance, an ink that can be used on vellum and other surfaces, in starlite silver) near the right edge.

Allow the ink to dry. Turn the stamped piece over and draw in pencil a hill over the reindeer and descending across the vellum. Draw hilly horizons across each of the pieces of vellum.
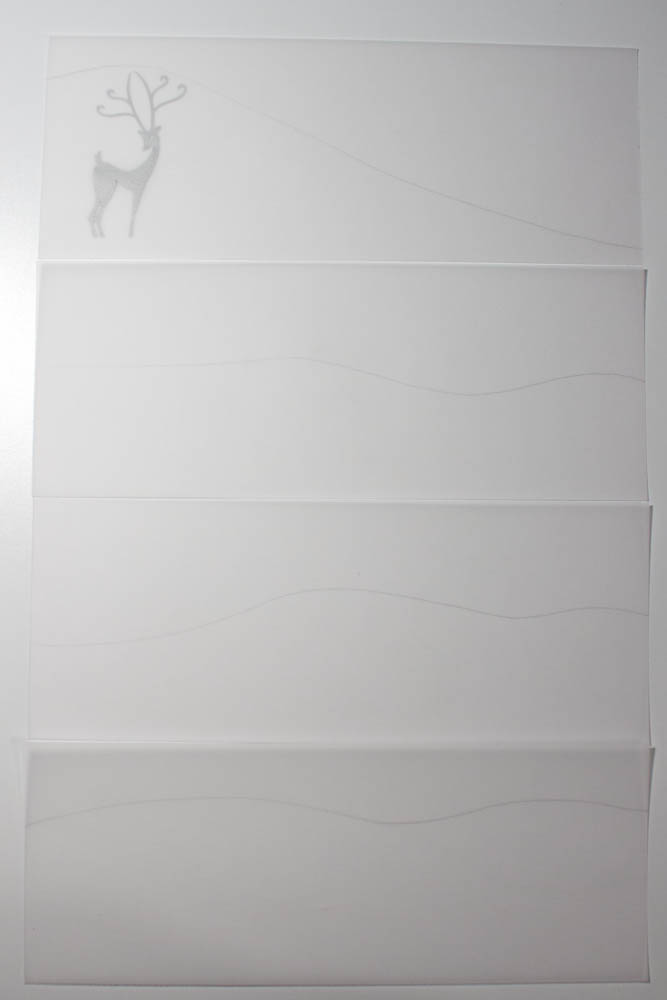
Cut along the pencil lines on each piece of vellum. Outline the reindeer in black pen (I used Sakura Pigma Micron 01, .25 mm). Cut an 8 1/2-by-3 1/2-inch piece of black-and-white, snow-patterned paper (I used the reverse side of “Christmas Damask” from the Christmas Home collection by Teresa Collins). Adhere each piece of vellum to the bottom portion of this piece, lining up the bottom edges, by folding the left and right edges of the vellum over the patterned paper and adhering the flaps to the back of this piece.
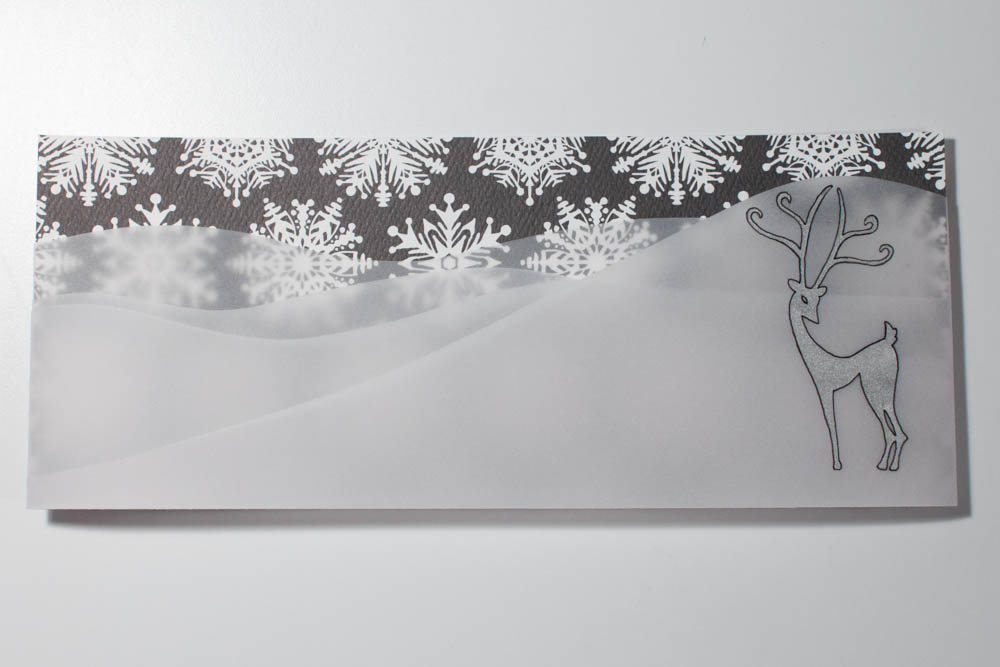
Make a card from an 8-by-9-inch piece of cobalt-blue textured cardstock. Adhere the patterned paper, centered, to the card’s front. Using glue, adhere a 5 1/4-inch piece of black-and-white, floral-patterned washi tape (such as from the Hambly Studios Screen Prints decorative washi tape set No. 2) close to the bottom edge of the card, starting from the left edge. Trim any excess tape from the edge and allow it to dry.

Cut a 5-by-1/2-inch piece of light-blue cardstock. Trim one end to a point. Using dimensional adhesive, adhere this piece over the washi, starting from the card’s left edge. Affix small, red-glitter letter stickers spelling “let it snow” (mine’s from the mini shimmer alphas Metro collection by Making Memories) to the right end of the light-blue piece. Affix two small, red-glitter asterisk stickers (also from the Making Memories collection) above and on the washi.

Cut a small slit in the card’s fold, close to the right edge. Insert a piece of thin black ribbon through the slit and tie it in a knot around the card’s front, keeping the knot close to the bottom edge. Adhere small clear and red rhinestone stickers (some of my rhinestones are Twinkle Goosebumps by Queen & Co.) near the light-blue piece and the reindeer.

What a beautiful card! I love what you did with vellum. Fun technique!
Beautiful and thanks for all the tips about how to make it.
What a cool technique! TFS!
Lovely card. Thanks for all the helpful instructions.
So pretty , love the vellum 🙂
Great technique! Love the vellum. 🙂