
My father-in-law loves cars. He has a large glass case to display model cars in his auto-body shop. When his birthday approached, I turned to my trusty Slice Elite to create a card I knew he’d love.
My husband helped me choose the car’s color, and suggested that I add flames to its side. For the flames, I used an embossing pen and yellow and orange-glitter powders. Two chipboard letters became wheels, with mirrored embellishments for hubs. I created a road using a dashed line and black background in Microsoft Word. This card turned out even better than I’d imagined it would.

Here’s how to make it:
Using a pencil, lightly draw flames onto a 4-inch-wide die-cut of a red car (I used my Making Memories Slice Elite, “Hit the Road” design card and red cardstock). Trace the pencil lines and fill in the flames with an embossing pen (such as Kuretake’s ZIG Emboss Writer) and cover it with yellow embossing powder on one end and orange-glitter powder on the other (I used Jo-Ann Craft Essentials metal pearl collection in yellow and American Crafts Zing! glitter finish in orange). Do not emboss the areas of the bumper and the headlight.
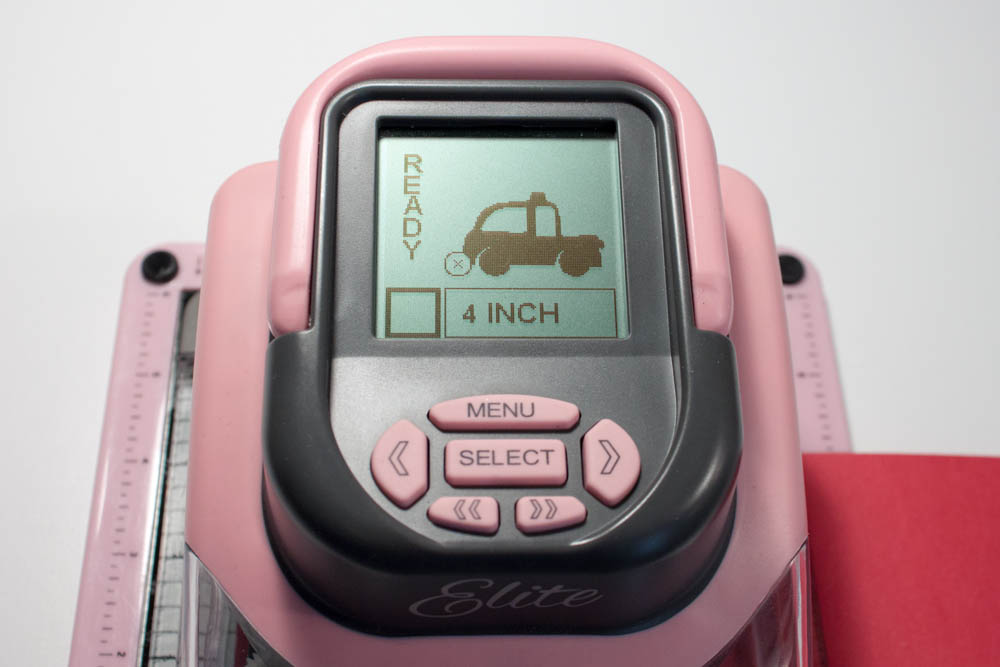
I created a 4-inch-wide die-cut of a car in red cardstock using the taxi image on the “Hit the Road” design card. I trimmed off the taxi sign.
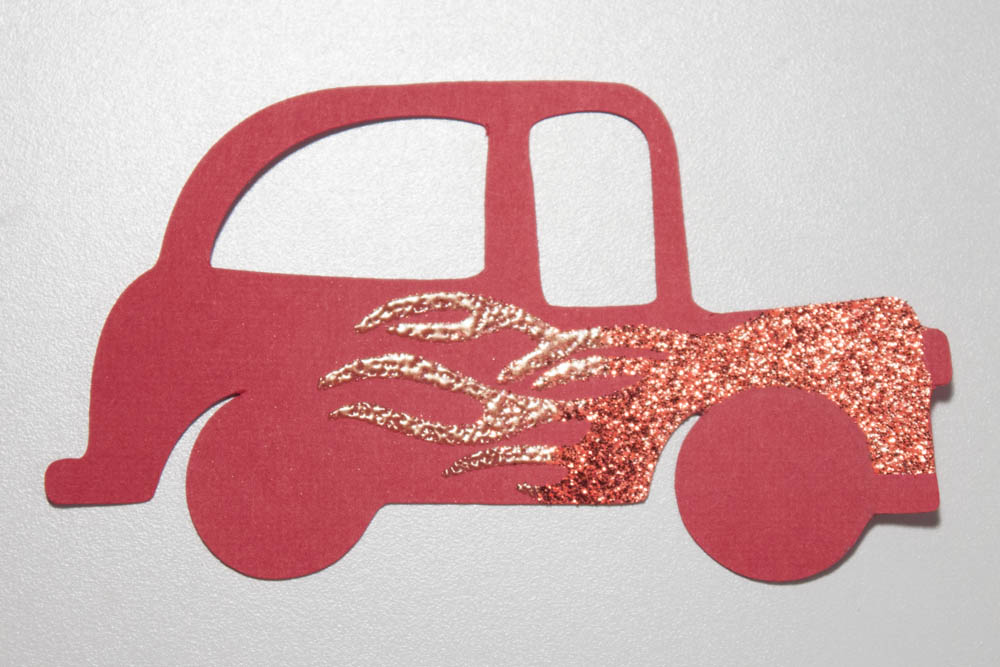
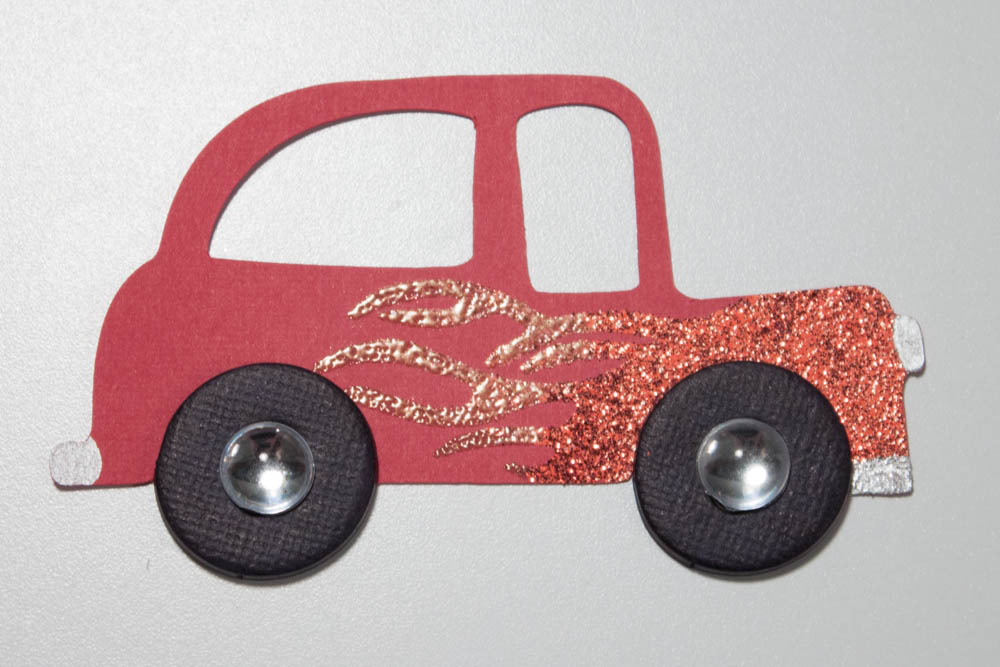
Color the headlight and bumpers in silver pen (I used a Sakura Gelly Roll pen). Color two chipboard “o”s (mine’s by Bazzill Basics) with black marker, and affix mirrored rhinestones (such as from the Tweet Memories collection by Heidi Grace Designs for Colorbok) in the center of each. Adhere the “tires” to the die-cut.
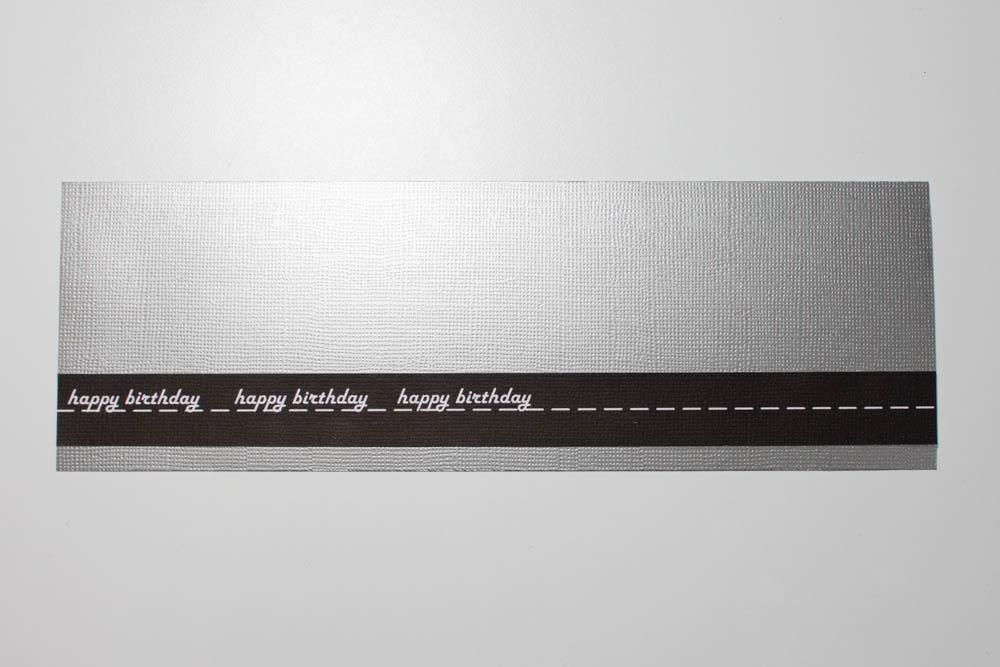
Using a computer program, create a 9-by-1 1/2-inch black box. Starting at the left edge of the box, type “happy birthday” in a white retro font (I used Harlow solid italic, 17 pt.) three times, leaving about half an inch of space between each phrase. Create a white dashed line just below the words. Print on white textured cardstock and trim the black box to 3/4 of an inch high. Cut a 9-by-3-inch piece of dark-silver textured cardstock (I used The Metallic Stack collection by Die Cuts With a View in gunmetal), and adhere the word strip close to the bottom of this piece.
Adhere the die-cut over the right end of the “road.” Cut a 9-by-3 1/2-inch piece of red-and-gray, herringbone-patterned cardstock (I used the reverse side of “Butter Beans” from the Neopolitan Bean Bisque collection by Jillibean Soup), and adhere the metallic cardstock, centered, over it. Affix a black photo anchor with black brad, square black rhinestone brad and two silver brads in a row to the upper-left edge of the metallic cardstock.
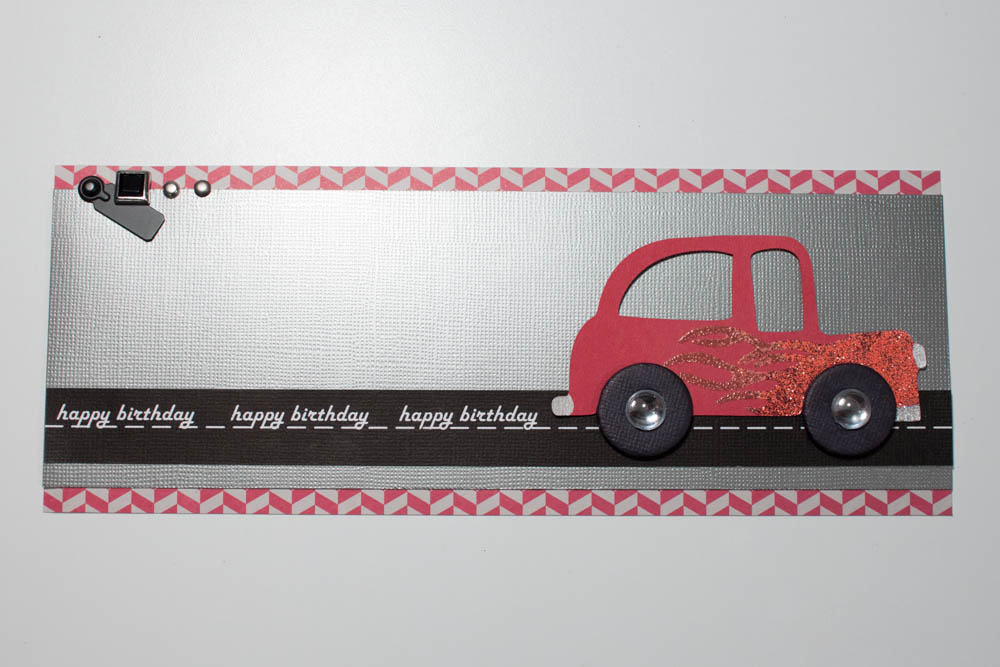
Make a card from a 9-by-8-inch piece of silver foiled cardstock and adhere the patterned paper, centered, to the card’s front.

Very cute car!!!