
In May, Two Peas in a Bucket launched a collection of digital files, which have been created in-house and in collaboration with designers. New designs are released monthly, which include some files that are available only for 30 days. A few of the designs are free of charge. Last month, I downloaded some of the cut files, including a lightbulb. Now, what would I do with that?
This week, the lightbulb came on in my mind (puns are fun), and I had a bright idea: neon! I printed out the lightbulb and cut it out using my Silhouette Portrait, colored it in with a highlighter and added neon glitter.
I then used my machine to cut out white and neon circles and print and cut out the sentiment that I had created. If you don’t have a die-cut machine, this card still is easy to make by printing out the shapes and cutting them out by hand (I’ve provided a PDF of my banner sentiment for those who would like to use it; see below). As for the circles, if I didn’t have my machine I would have traced circular objects, such as lids, onto my papers and cut out the shapes by hand.

Did I mention that puns are fun?
Here’s how to make it:
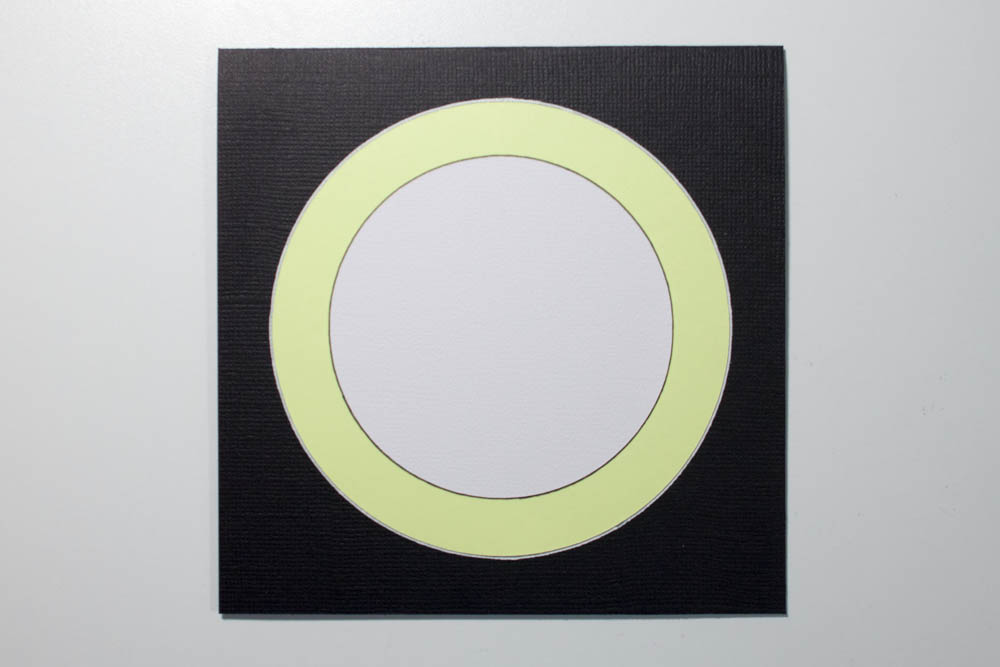
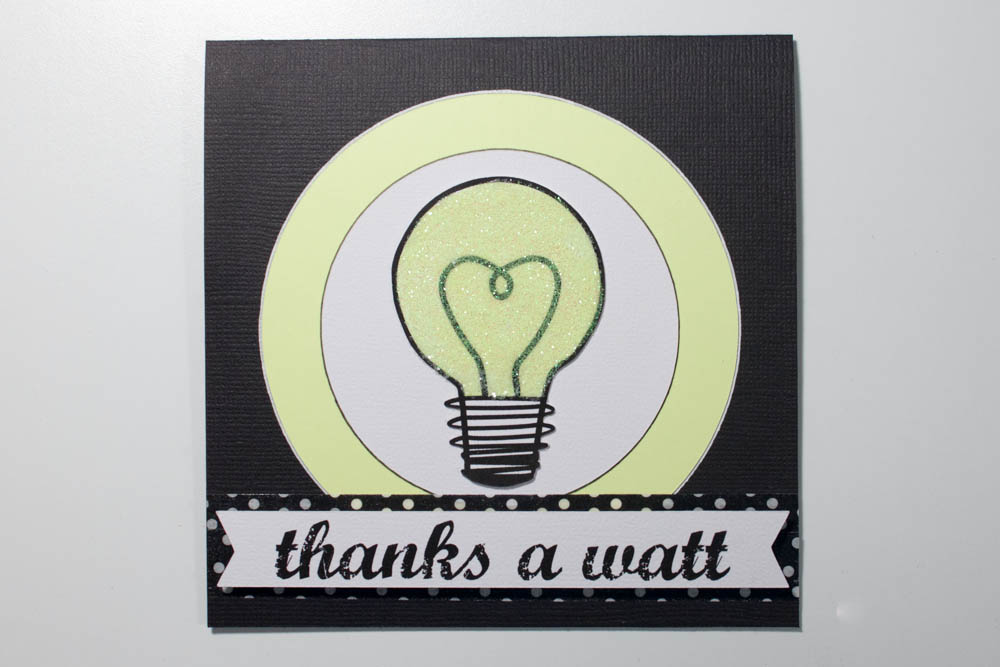
Make a card from a 5-by-10-inch piece of black textured cardstock. Cut a circle that’s 4 inches in diameter out of a piece of neon-yellow cardstock (mine’s by Recollections) and adhere it, centered, to the card’s front. Cut a circle that’s 3 inches in diameter out of a piece of white textured cardstock and adhere it, centered, onto the neon circle. Trace around the neon circle in white pen (such as Sakura Gelly Roll in white) and trace around the white circle in black pen (I used Sakura Pigma Micron 01, .25 mm).
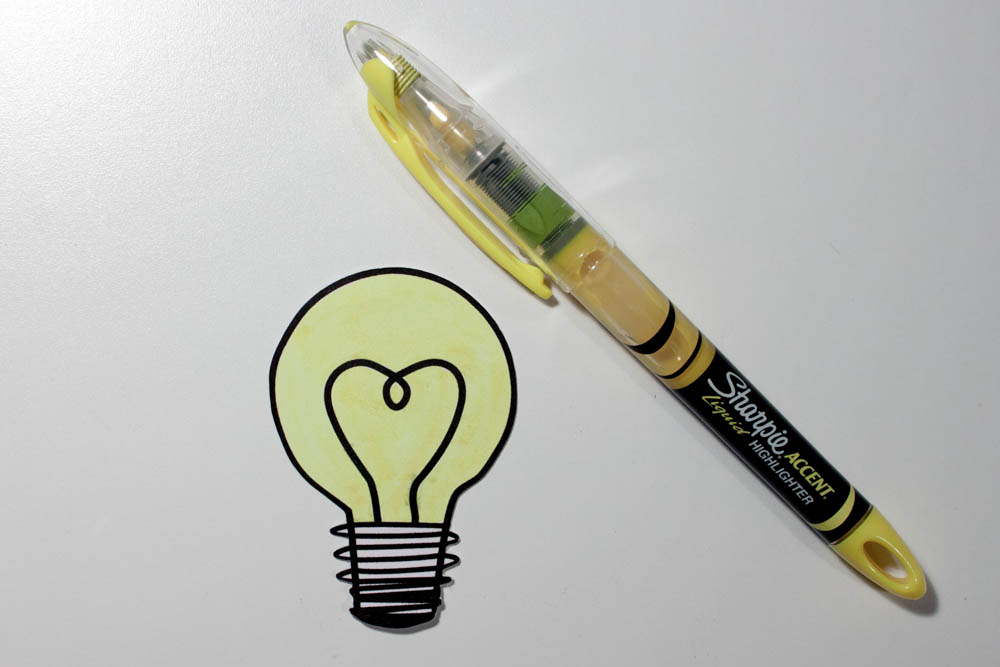
Color a die-cut of a lightbulb (I created mine using my Silhouette Portrait and a file from Two Peas in a Bucket; while that file is no longer available, a similar design can be found here) with neon-yellow ink (I used a highlighter).
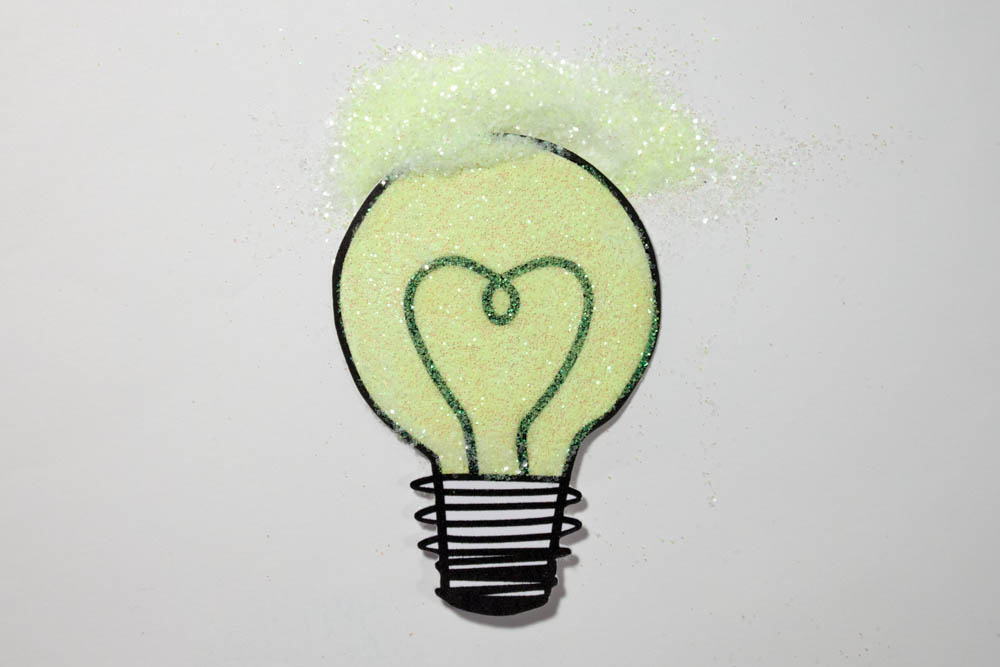
Cover the bulb portion of the die-cut in glue. Cover the glue in neon-yellow glitter (such as American Crafts neon Wow! glitter in lemon) and shake off the excess.
Adhere the lightbulb, centered, to the white circle. Affix two pieces of black-and-white polka dot washi tape (such as black dots from the SMASH collection by K & Co.) horizontally to the card’s front, close to the bottom edge and overlapping each other. Trim the excess from the edges.
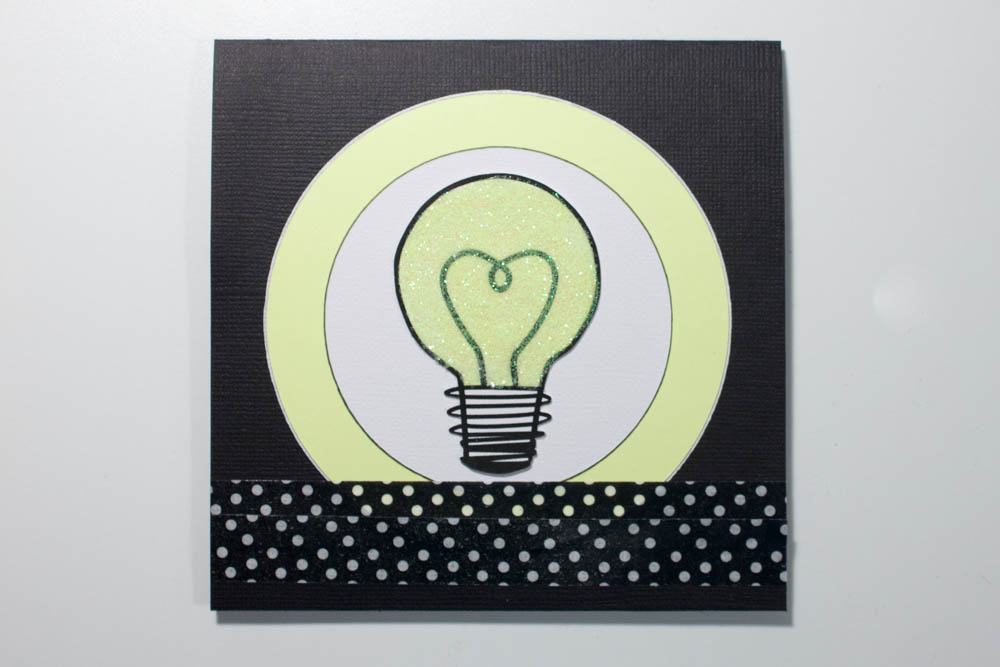
Using a computer program, type “thanks a watt” in a black font (I used Marcelle Script, which can be downloaded here) centered over a banner shape that’s about 5 inches wide and about 3/4 of an inch high (I created my sentiment using my Silhouette; you can download my sentiment design here). Print out the sentiment on white textured cardstock, cut it out and affix it, using dimensional adhesive, over the washi tape.
Adhere a wood veneer die-cut of an arrow (mine’s from the Hipster collection by Basic Grey) at an angle in the upper-right corner of the card, pointing toward the lightbulb.

*LOL* Love it – puns and all! Such a creative idea for the light bulb and use of neon.
Love the embossed light !
Oh that is too cute!
Ha! Cute card idea! Love the pun especially!