
Stickers, like washi tape, speed up crafty productivity. Just stick and move on … or not entirely, as with this card. I wanted to give my card more dimension (I feel as though I’ve been putting foam adhesive on everything I’ve made lately), but in order to apply dimensional adhesive to a sticker and not have the sticker … well, stick … to the card, I first placed the sticker onto cardstock and cut it out. The sticker has all kinds of swirls and corners to cut around. This may test another person’s patience, but I find it relaxing … as long as my cutting hand doesn’t cramp up.
To additional dimension, I applied pearl-like embellishments to my centerpiece sticker. A little “bling” always is a good thing.

Here’s how to make it:
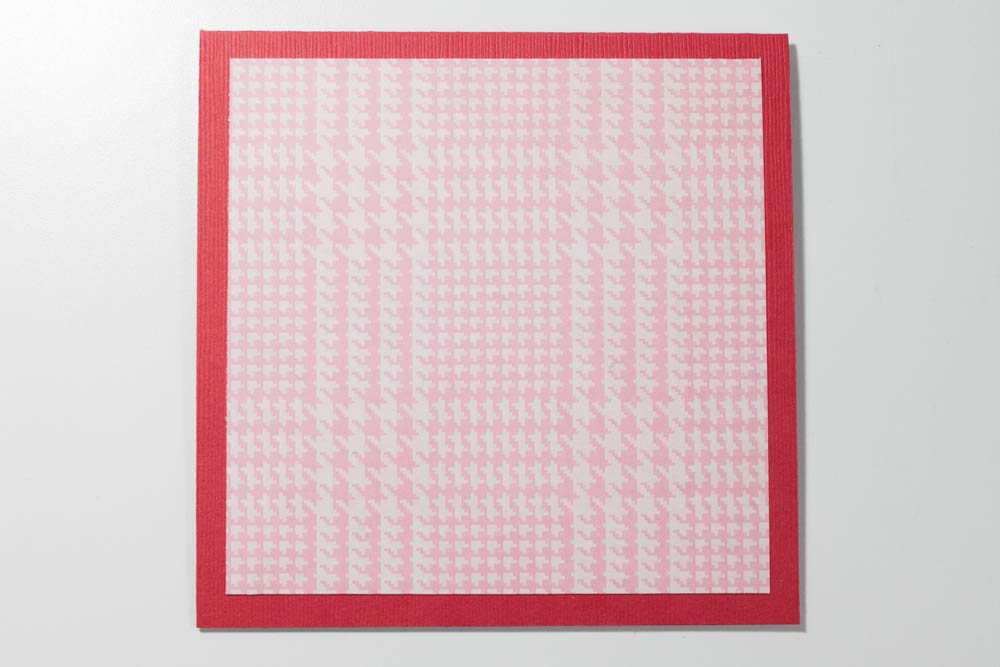
Make a card from a 5-by-10-inch piece of red textured cardstock (such as Bazzill Basics in ruby slipper). Cut a 4 1/2-inch-square piece of pink hound’s-tooth cardstock (I used the reverse side of “Newsprint” from the Yours Truly by Cassandra Cooper collection by Echo Park Paper Co.), and adhere it, centered, to the card’s front.
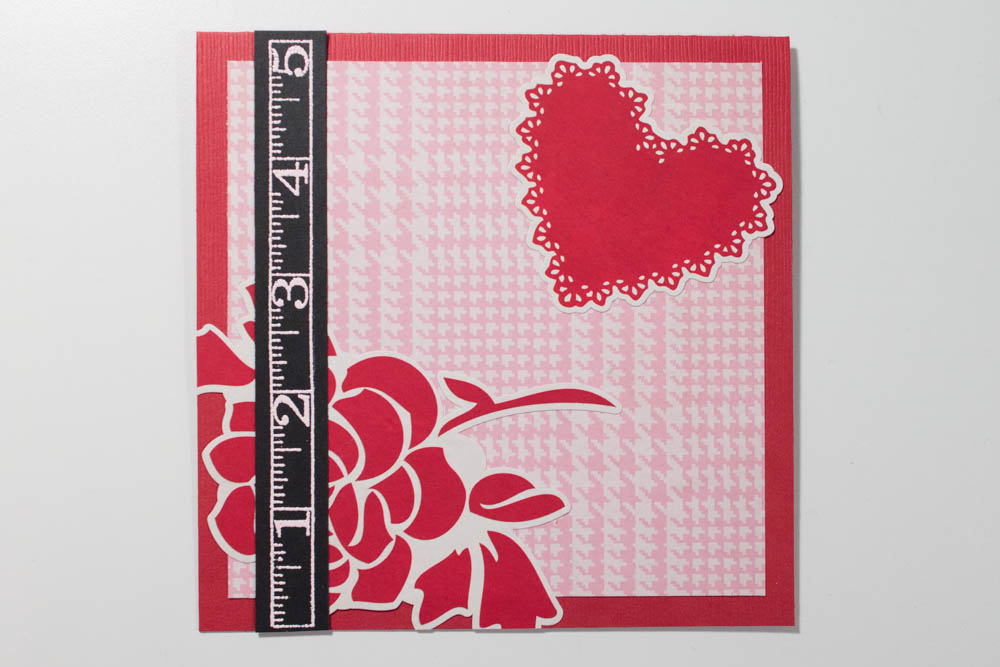
Adhere a large, red rose sticker (mine’s from the Yours Truly element stickers sheet) to the lower-left corner of the card’s front, with its edges overhanging a little.

Trim off the excess sticker from the card’s edges. Stamp a ruler image (mine’s from the Sew Stylish collection by Hero Arts) in light-pink ink (such as ColorBox Cat’s Eye Queue in chiffon white) onto a piece of black cardstock.

Apply light-pink embossing powder (I used American Crafts Zing! opaque powder in rose) over the freshly stamped image and set it with a heat gun. Trim the cardstock around the ruler so that it is 5/8 of an inch by 5 inches and adhere it, vertically, 1/2 an inch from the card’s left edge. Affix a large, red heart-shaped sticker (Yours Truly collection) at an angle to the upper-right corner of the card.
Apply a large (almost 5 inches wide), black-and-off white sentiment sticker (I used the “Love you beyond measure” sticker from the Yours Truly collection) to a piece of cardstock and cut it out. Affix several small and medium-sized red, pearl-like embellishments (such as Queen & Co. pearls in berry red) around the inner edges of the sticker.

Using dimensional adhesive, affix the sentiment, centered, to the card’s front.

If it’s not necessary for the sticker to be stuck to cardstock for strength, you can always remove the “stick” by dusting it with baby powder!
Super cute, and I am finding I like using stickers again. They are so quick and fun. Blessings,
Very nicely done.
It’s beautiful! 🙂
Very pretty!!
That is so pretty, great card!